Our Mosaic Workshop

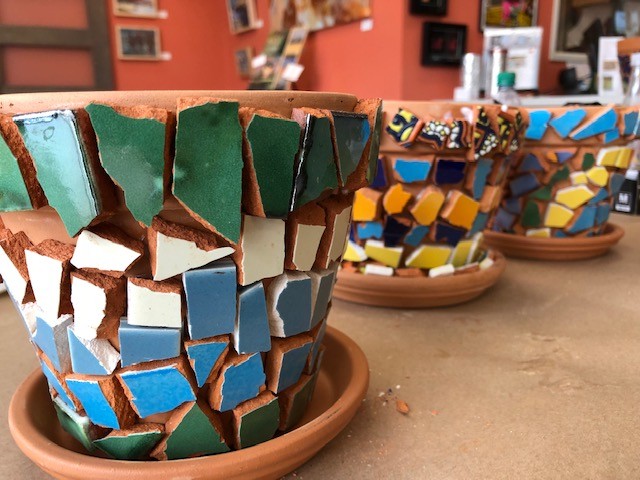
 Wow! We had a full house for our Mosaic Workshop yesterday! It was a really fun + creative time. One of our students brought a wooden cactus to mosaic, and another a mirror. Everyone else did a terracotta flower pot and dish. For most this was their first time doing mosaic. Everyone went home with a bag of grout. Instructions and video below for grouting.
I’m looking forward to scheduling another class…Next time we will do something simpler..like a serving tray! Attached the video on how to grout. Written instructions below the video…
Grouting – If you have used a cement based adhesive it is recommended that you wait 24 hours before grouting.
To grout: Wear gloves. Use a plastic cup to mix the grout. Begin by adding a small amount of water to the grout and mix while trying to smooth out the grout. Continue to add small amounts of water until it is a little firmer than pudding. You want it to be able to stay on the knife as you apply it. If you add too much water you will ruin your grout so add it slowly until it is just the right consistency. You have only about 10 minutes to apply as it sets quickly. Use the plastic knife provided to spread it on like peanut butter! Push it into the cracks so that everything is filled. Now dampen (not soaking wet) your sponge and wipe off the excess grout until it is smooth, making sure that all the cracks are filled. At the edges of your project round the grout so that it looks finished. Wait about 10-15 minutes until it feels like it is hard and then dampen the sponge again and wipe clean. There will be a cloudy mist on the tiles until it is wiped a few more times. You may use an old soft cloth to finish.
Grout sealer is recommended if the piece is going to be outside. It will help protect it from the elements. This is a simple application. It has the consistency of water. Apply to cloth and wipe on, allow to sit for 5 min and then wipe off.